This short account of the May 1942 Battle of the Coral Sea focuses on the strategically significant outcomes of the battle and how they related to the future of World War 2 and Australians in particular. ...
HMAS Australia II
Book Review: Dark Secrets – The True Story of Murder in HMAS Australia
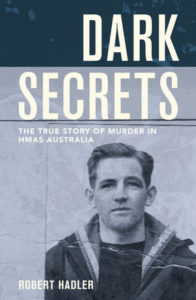
Dark Secrets – The True Story of Murder in HMAS Australia. Paperback 320 pages by Robert Hadler, published by Wilkinson, Sydney, 2020. Discounted at about $23.00 Murder in the Royal ...
The HMAS Australia II Story by Kez Hasanic
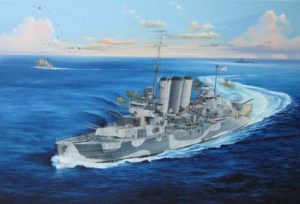
Online presentation about HMAS Australia II by Kez Hasanic. The HMAS Australia II Story ...
Australians in the Decisive Thrust KING II – The Leyte Landings
By Paul Baker Seventy-five years ago, on 18 October 1944, beaten only by the fast minesweepers and the attack forces securing the mouth of the Gulf, the crew of HMAS ...
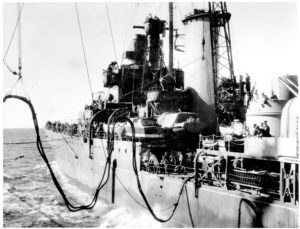
Occasional Paper 16: HMAS Australia and Atlantic rescue of Coastal Command Sunderland – 1940
October 2017 On Monday 28th October 1940, I was serving as an eighteen year old Midshipman in HMAS “Australia”, an 8 inch gun cruiser. At that time, we had arrived on ...
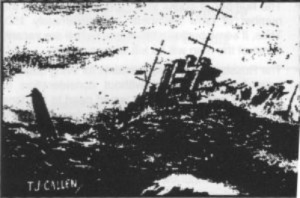
‘Mission to Kerguelen’ – An Australian Military Operation in the Sub-Antarctic islands in 1941
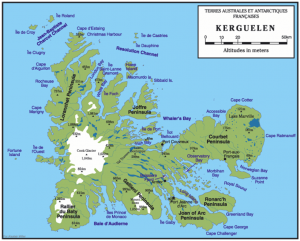
By Rohan Goyne I refer to the excellent article Antarctica the forgotten Continent by Hugh Farmer in the Naval Historical Review Vol. 38 No2 June 2017 and offer the following ...
Book review: Flagship: The Cruiser HMAS Australia II and the Pacific War on Japan
By Mike Carlton. Penguin Random House, Sydney, August 2016. Hardcover 642 pages with illustrations and many b&w photographs. RRP $50 – discounts available. Some naval history books traverse well-worn tracks ...
The Battles for Leyte Gulf: where Australian ships fought in one of the greatest battles in naval history
By David Scott David Horace Ford Scott grew up on a soldier-settler block near Holbrook, NSW but his parents were forced to walk off the property during the Depression and ...
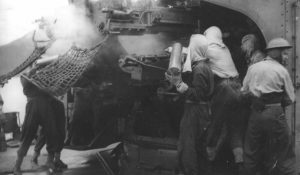
The Battle of the Coral Sea
MIDN Lachlan Montgomery joined the RAN in February 2014 coming from a family of five in Ringwood Victoria. His father is a serving member of the Victorian Police Force and ...
The Royal Australian Navy at Leyte Gulf October 1944
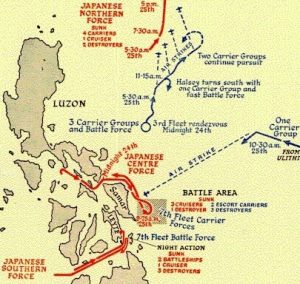
By Kingsley Perry The series of sea battles at and around Leyte Gulf in October 1944 marked a turning point in the Pacific war. Despite together representing the greatest sea ...