By Max Thomson HMAS PERTH survivors were the subject of a special request tabled to authorities when Changi prisoners of war were released in Singapore following Japan’s surrender in 1945. ...
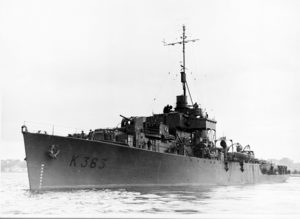
HMAS Perth II
Occasional Paper 75: The Vietnam War and the Royal Australian Navy
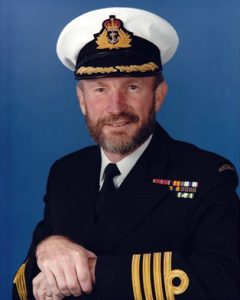
The following address was delivered by Captain Ralph T. Derbidge MBE RAN (Retired) at the Melbourne Shrine of Remembrance to mark Vietnam Veterans Day on 18 August 2010. It describes ...
The Missing DDG
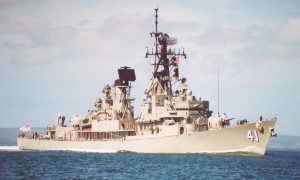
By John Smith A question was recently posed why hull number 40 is not used by HMA Ships. The DDGs Perth 38, Hobart 39 and Brisbane 41 are to be followed by the ...
Red Lead – A Cat’s Tail
By Walter Burroughs One of the privileges of writing naval history is occasionally being invited to visit ships and establishments and meeting some of the fine men and women who ...
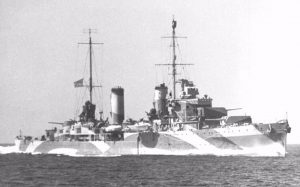
The Importance of Defence Strategy following the Battle of Sunda Strait
By Sub-Lieutenant G. Bateman, RAN Garry Bateman was born in Plymouth on 23 July 1980. His father was a Chief Petty Officer in the Royal Navy serving in submarines. This ...
Australian Naval History on 9 November 2009
A de Havilland Canada DHC-8-202Q Dash 8 commenced flying for the R.A.N. Hydrography Institute. ...
Australian Naval History on 29 November 2006
Loss of an Australian Army Blackhawk helicopter which crashed while attempting to land on aft flight deck of HMAS Kanimbla II. It was lost over the side of the ship, ...
Australian Naval History on 24 November 2001
HMAS PERTH, (former guided missile destroyer), was sunk as a dive wreck at Seal Rock, Albany, WA. The scuttling charges were fired by a former member of the crew of ...
Australian Naval History on 15 October 1999
The guided missile destroyer HMAS PERTH, (CAPT L. Rago, RAN), was decommissioned at Sydney after a career spanning 34 years. She was the first of the three DDG’s to be ...
Australian Naval History on 24 April 1999
HMAS PERTH, (destroyer), and HMAS ARUNTA, (frigate), arrived in Ho Chi Minh City, (Saigon), Vietnam, for a four day port visit. This was the first visit to Vietnam for Australian ...