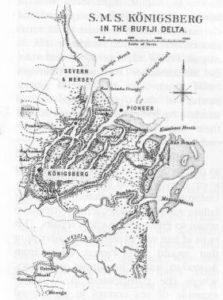
Butcher, 2nd Class Frederick Priest Merrill, R.A.N., H.M.A.S. Pioneer, wrote to his parents in Sheffield with his account of the sinking of the S.M.S. Königsberg in the Rufiji delta, German ...
HMAS Pioneer
HMAS Pioneer – Blockading German East Africa, 1915-16
90 Years on: Rabaul and Sydney/Emden 1914
This article was originally published in ‘Semaphore’, the newsletter of the Sea Power Centre – Australia. It is republished with the kind agreement of the Sea Power Centre. This year ...
Search for the German Asiatic Squadron – 1914-1916
Letters – HMAS Pioneer as a Midshipman
Early in 1914 1 did an extended period of training in HMAS Pioneer, as a Midshipman RANR. One Saturday in April, 1914, when Pioneer was in Corio Bay to give weekend ...
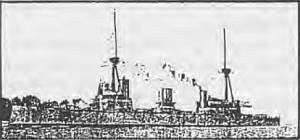
HMAS Pioneer – The RAN’s First Cruiser
IN A PREVIOUS ISSUE of the Naval Historical Review we gave a short resume of the career of the 3rd class protected cruiser Pioneer in the Royal Navy. Let us ...
Twins Were Pioneers of the RAN
An announcement that two brothers had been appointed to command sister ships in Australia’s Destroyer Squadron has brought to light the careers of twin brothers who were pioneers of the ...
Australian Naval Aviation – Part 1
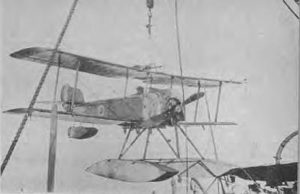
THE HISTORY OF WORLD naval aviation began, tentatively, in the lighter-than-air era. As far back as November 1861, during the American Civil War, the Union Army – employing maritime techniques – released the Washington balloon from a remodelled coal barge, the G.W. Parke Curtis, to observe the enemy at Budd’s Ferry. ...
Australian Naval History on 18 February 1931
The bare hull of the former HMAS Pioneer was scuttled off Sydney ...
Australian Naval History on 7 November 1916
HMAS Pioneer paid off at Sydney. Thereafter she was used as an accommodation ship at Garden Island until 1922. In May 1923 she was handed over to Cockatoo Dockyard by ...